 EN

How to Inspect an Oil Tank Truck Before Long-Distance Transport?
Before a long run, an oil tank truck deserves more than a walk-around with a flashlight. The driver, dispatcher, and maintenance lead need the same answer to one question: is this vehicle safe to release for the planned load, route, and weather? A disciplined pre-trip inspection turns that answer into a documented sequence. It also prevents a minor seep, loose fitting, tired tire, or missing document from becoming a roadside delay or a spill.
This practical checklist is written for fleet teams moving petroleum products. It is not a substitute for the tank specification, carrier procedures, shipper instructions, or the regulations that apply in the countries and jurisdictions on the route. If those sources set a stricter rule, follow the stricter rule.
Start with a release decision, not the keys
Park the oil tank truck on level ground where the shell, underside, and running gear can be seen. Set the parking brake, use the site’s isolation procedure, and wear the required PPE. Review the planned product, compartment allocation, gross weight, route restrictions, and delivery sequence before touching the equipment. A multi-compartment load can change axle loading and surge behavior as product is delivered, so the route plan should match the actual load plan.
Use one inspection form for the driver’s observations and one clear escalation path. A good tanker inspection does not rely on memory: it records defects, the person notified, and whether the vehicle was released, repaired, or held.
1. Check tank shell, heads, supports, and manways
Walk around the tank slowly, looking along the shell rather than directly at it; side lighting often makes dents, ripples, or wet streaks easier to see. Check shell and head areas for fresh damage, corrosion, abrasion, cracked paint that may conceal a defect, and signs of leakage. Pay special attention around welds, openings, brackets, saddle supports, and the areas where piping meets the tank.
Inspect manway covers, covers seals, clamps, hinges, and fasteners. They should be secure, clean, and free of visible product residue. Confirm that covers close fully and that no gasket is displaced, split, swollen, or missing. Do not tighten, adjust, or open a closure under pressure unless the approved procedure specifically permits it.
For a U.S. specification cargo tank, 49 CFR 180.407 is a useful example of the inspection focus: shell and heads, piping, valves, gaskets, manhole closures, emergency devices, and markings all receive attention. Whatever rule set applies to your oil transport, treat a visible leak, a new structural defect, or an inoperative closure as a stop condition.
2. Inspect valves, hoses, vents, and emergency closure
Move from the tank to every loading, unloading, and vapor connection. Verify caps, plugs, dust covers, seals, couplings, and hose stowage. Look for dampness, staining, drips, chafing, damaged threads, loose supports, and a hose that is kinked, blistered, crushed, or rubbing on an edge. Confirm that manual valves are in the required travel position and that valve handles, labels, and lockouts are intact.
Then check the emergency shutdown arrangement using the fleet’s approved functional test. The driver should know where each remote control is located and how it is identified. Do not assume a control works because it is present; record the result of the prescribed function check. Include pressure-relief and venting components in the visual review, without attempting unauthorized adjustments.
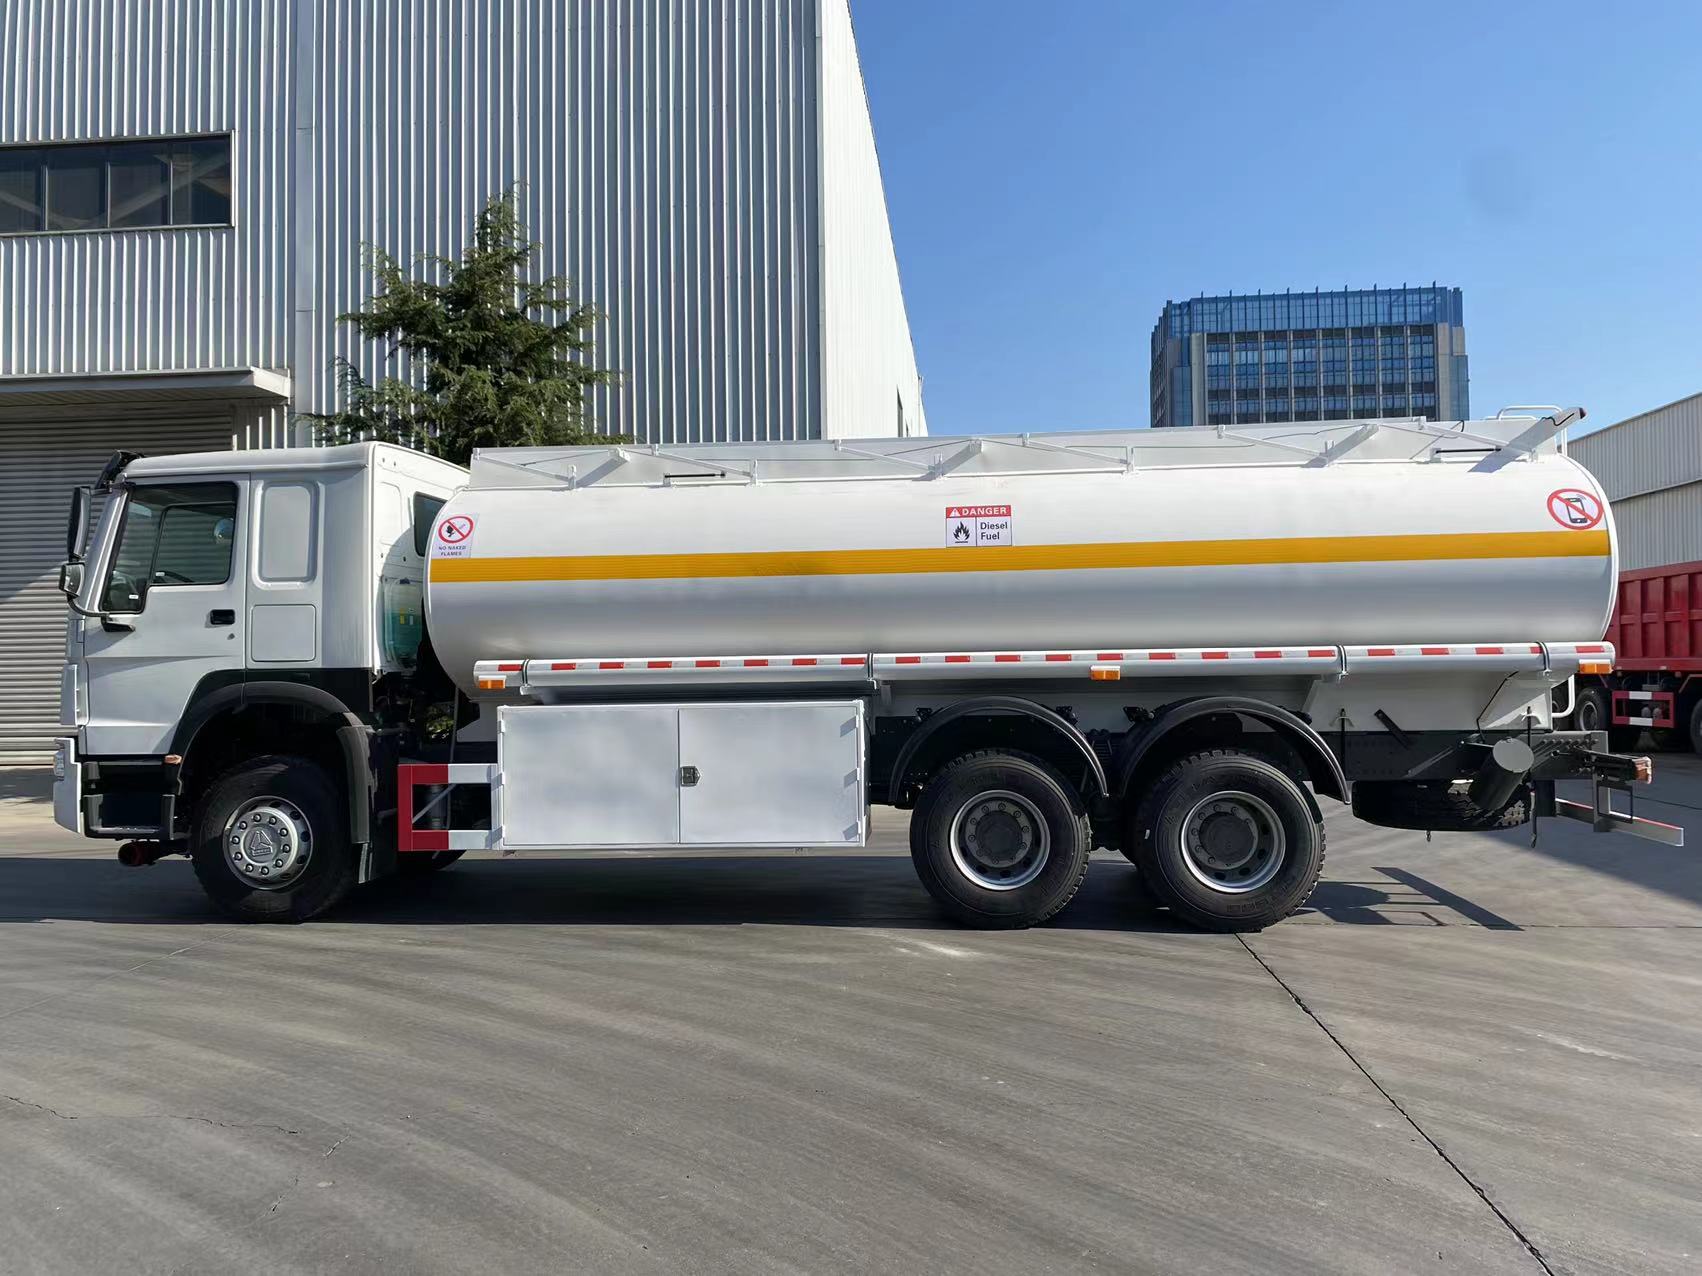
Good fuel truck safety also means inspecting protection around rear piping and fittings. A bent guard, damaged bumper, or exposed connection can change the consequence of a low-speed impact.
 3. Inspect chassis, brakes, tires, and lights
Tank integrity alone cannot make an oil tank truck roadworthy. Check tractor and trailer coupling hardware, landing gear where fitted, frame members, suspension attachments, wheel ends, and visible air or hydraulic lines. Look under the vehicle for leaks and ensure nothing is hanging or rubbing.
For tires, inspect inflation by the fleet method, tread condition, sidewall cuts, embedded objects, uneven wear, valve caps, and dual-tire spacing. Check wheels and rims for damage, missing fasteners, or evidence of movement. Review the braking system for visible air leaks and damaged hoses, then complete the required service-brake and parking-brake tests. FMCSA inspection guidance lists service brakes, parking brakes, tires, wheels/rims, and emergency equipment as core vehicle-inspection items; local requirements may add more.
Test lamps, reflectors, turn signals, brake lights, hazard lights, and any required beacons. Clean mirrors, cameras, and lenses. A long-distance pre-trip inspection should also verify steering response and warning indicators before the vehicle enters public traffic.
4. Control ignition and transfer hazards
Review bonding and grounding equipment before departure and before each transfer operation. Inspect bonding cables, clamps, reels, and connection points for corrosion, broken strands, poor jaw grip, or damaged insulation. Keep the equipment clean and stowed so it can be used correctly at the loading or unloading point. The exact bonding or grounding sequence must follow the terminal, product, and local safety procedure.
Confirm the presence, accessibility, and serviceability of required fire extinguishers, spill-control materials, warning devices, PPE, and emergency communications. Check placards, hazard markings, and product identification for legibility and match them to the assigned load. This part of a tanker inspection is about readiness: equipment that cannot be found or used under pressure is not effective emergency equipment.
5. Match paperwork to the vehicle and load
Before release, compare the dispatch instructions with the vehicle: registration and inspection status, driver authorization, route permits where required, shipping papers, emergency-response information, product data, compartment plan, seal records, and the current defect report. Confirm that periodic tank testing or inspection records are current for the tank and product service. If a previous defect was deferred, verify the written authorization and any operating restriction.
Brief the driver on planned fuel stops, restricted routes, safe parking points, weather, and the first contact to call for an abnormal condition. Documentation is not merely administrative; it connects the physical oil tank truck to the correct cargo, controls, and emergency response plan.
Stop criteria: when the truck must not leave
Hold the vehicle and notify the responsible supervisor or maintenance authority if you find any active or suspected product leak; damaged tank shell, weld, support, manway, valve, hose, or gasket; a failed emergency closure test; brake, tire, wheel, lighting, coupling, or steering defect; unreadable required markings; missing emergency equipment; incorrect paperwork; or any condition outside the approved operating limits.
Do not “watch it on the road,” improvise a repair, or rely on a verbal release for a hazardous condition. The safe choice is to document the defect, secure the oil tank truck, and obtain a qualified release after correction.
A repeatable pre-trip inspection routine
- Review the load, route, documents, and prior defect record.
- Inspect tank structure, closures, supports, and visible leak points.
- Inspect valves, hoses, vents, guards, and emergency controls.
- Inspect chassis, coupling, brakes, tires, wheels, lights, and mirrors.
- Verify bonding/grounding gear, emergency equipment, placards, and PPE.
- Record findings, resolve stop conditions, and release only when the checklist is complete.
A consistent routine makes fuel truck safety easier to verify across drivers and shifts. It also gives the next person in the chain a useful record instead of an assumption. For long-distance oil transport, that discipline is one of the most practical safeguards a fleet can use before the wheels begin to turn.